
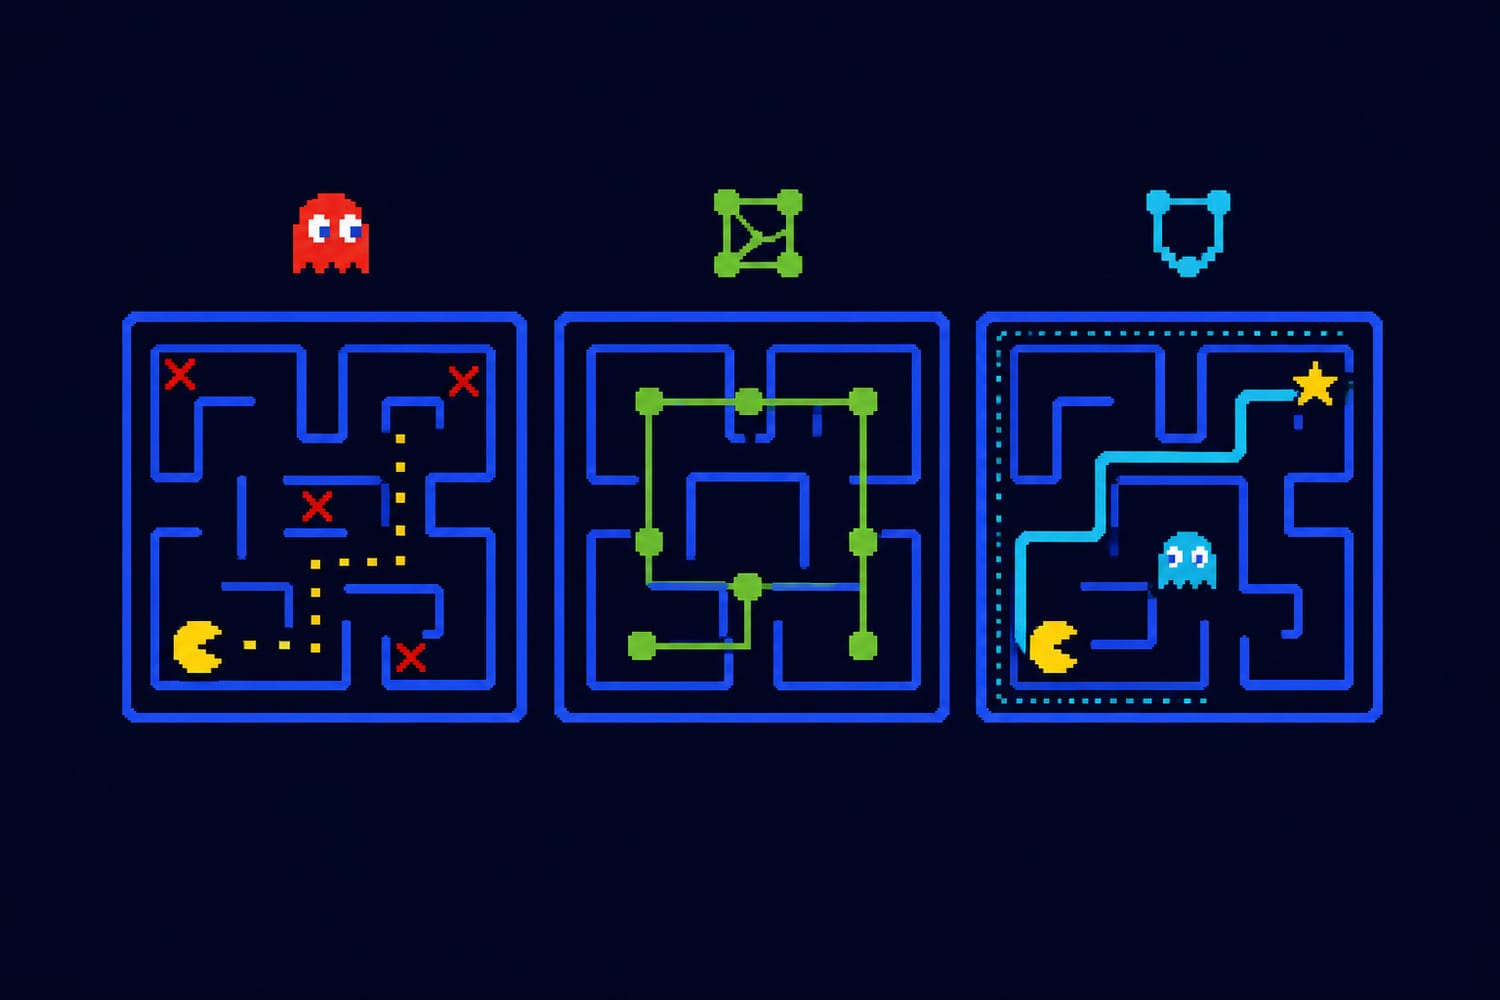
How to Solve Mazes Faster: Dead-End Filling, Junction Maps, and the Wall-Following Trap
How to Solve Mazes Faster: Start by Seeing the Choices
The quickest way through a maze is rarely to trace every corridor from the entrance. If you can see the whole puzzle, eliminate dead ends first, then compare the routes that remain at each junction. If you’re navigating without a full view, mark where you’ve been instead of relying on the familiar—but limited—rule of following one wall.
A maze can look like a tangle of lines, but most of those lines aren’t decisions. The important places are the entrance, the exit, the dead ends, and the junctions where routes split or meet. Learning to notice those features turns a busy picture into a smaller, more manageable puzzle.
Before you begin, check the goal. Are you looking for any route to the exit, the shortest route, or a path that also visits a key or checkpoint? Those are different challenges. A route that reaches the exit may still be longer than another, and a corridor that looks useless in an ordinary maze might matter if it contains something you must collect.
Dead-End Filling: Remove Routes That Cannot Work
A dead end is a corridor with only one way in and no way onward. Unless it contains a required item or is itself your destination, it cannot be part of a route from the entrance to the exit: going in means coming back out the same way.
Dead-end filling makes that fact visible. On a paper maze, lightly shade a dead-end corridor from its closed tip back to the first junction. On a screen, if you cannot draw on the puzzle, trace it with your eyes and remember that branch as ruled out. University of Wisconsin lecture materials describe the method as identifying dead ends and filling their paths back to a junction, while noting that loops require extra care.
The useful trick is to repeat the process. Suppose a three-way junction has two branches that both end blindly. After you rule out those branches, the junction may itself become the tip of a longer dead end. Continue filling backward. What looked like several separate choices can collapse into one eliminated section.
Dead-end filling works especially well when a maze has many branching cul-de-sacs. It is less decisive when routes form loops: a loop has no dead end to fill, even if taking it adds an unnecessary detour. If several routes remain after your first sweep, that does not mean you missed something. It means it is time to compare them.
If a large maze feels overwhelming, work on one region at a time: clear its obvious dead ends, then see how its surviving corridors connect to the next region. That is the same useful principle behind breaking an overwhelming puzzle into solvable pieces.
Junction Maps: Turn Corridors into a Simple Diagram
Once the obvious dead ends are gone, stop studying every bend. A bend where you have no choice is just part of a corridor. A junction is where you must decide which way to go.
To make a junction map, draw a dot for the entrance, exit, and each important junction. Connect two dots if a continuous corridor runs between them. You can label the dots A, B, and C, or give them memorable names such as “bridge” and “upper crossing.” If finding the shortest route matters, note each connecting corridor’s length by counting squares or estimating distance consistently.
For example, imagine two routes from junction A to the exit, D:
- A → B is 4 squares, and B → D is 7 squares: 11 squares total.
- A → C is 5 squares, and C → D is 5 squares: 10 squares total.
The second route uses the same number of corridor connections but is shorter. That is why a map of junctions alone is enough to show where you can go, while length labels help show which route is shortest. Puzzles Arcade’s guide to making hard puzzles easier with diagrams and symbols offers the broader idea: record the details that affect the solution, rather than copying everything you see.
For a square-grid maze in which every move has the same cost, a computer can find a shortest route using breadth-first search: it checks reachable squares in order of their distance from the start. If you compress the maze into a junction map instead, remember that a long corridor and a short corridor should not automatically count as equal steps. Kansas State University’s introduction to unweighted shortest paths explains why equal-length moves make breadth-first search suitable for a maze grid.
You do not need to run an algorithm to benefit from the idea. For a hand-drawn puzzle, a tiny map and a few length labels are often enough to compare the last two or three candidates.
The Wall-Following Trap: Simple Does Not Mean Foolproof
“Keep your right hand on the wall” is memorable advice. Starting from a suitable entrance, following one continuous wall can guide you through certain mazes without requiring a map. But wall-following is not a universal maze solver, and it does not promise the shortest route.
Picture a loop of corridor surrounding a freestanding block of walls. If you begin following that block’s boundary, you may travel all the way around it and return to where you started. Meanwhile, the exit could lie along a different wall. A goal placed inside the maze rather than at a reachable outer exit creates another reason not to assume that hugging a wall will take you where you want to go. Research on maze solving discusses wall-following alongside other methods, and University of Illinois teaching materials point out how adding loops changes the behavior of simple maze-solving approaches.
There is a second trap even when wall-following does reach the exit: it may take a long scenic route. On a paper maze where you can see the whole layout, dead-end filling and junction mapping usually put that information to better use.
So when is wall-following helpful? Treat it as a navigation tactic for limited visibility, not as proof that you have found the best path. If the maze is visible, scan it. If you are exploring it one corridor at a time, keep track of your choices.
When You Cannot See the Whole Maze, Mark Your Progress
Dead-end filling depends on seeing corridors you have not entered yet. In a first-person or hidden-layout maze, you must discover the map as you go. The most valuable habit is simple: distinguish a new passage from one you have already explored.
At each junction, make a note of the landmark and the direction you arrived from. Try an unexplored branch. If it ends blindly, return to the junction and mark that branch as tested. If it connects to a familiar junction, record the connection rather than treating it as a fresh route. Continue until you find the goal or have accounted for every available branch. Backtracking methods use this kind of record to avoid repeatedly making the same unhelpful choice.
Your marks can be pencil strokes on a printed map, a short list beside the puzzle, or mental labels for unmistakable landmarks. Use whichever method the game allows. What matters is that “I have been here” and “I have checked every way out of here” are not the same thing.
A Fast Routine for Your Next Maze
Put the three ideas together in an order that suits the puzzle:
- Locate the entrance, exit, and any required stops.
- If the whole maze is visible, fill obvious dead ends and repeat as new ones appear.
- Map the surviving junctions. Ignore bends that offer no choice.
- Compare remaining routes if distance or move count matters.
- If the maze is hidden, record explored branches and backtrack deliberately instead of circling a wall indefinitely.
- Trace your chosen route once before committing, checking every turn and required stop.
Speed comes less from rushing your pen or your character and more from avoiding decisions you have already settled. Rule out what cannot work, simplify what remains, and know when a familiar shortcut has reached its limit.

